This post is a bit of a blast from the past (March 29, 2014 to be exact).
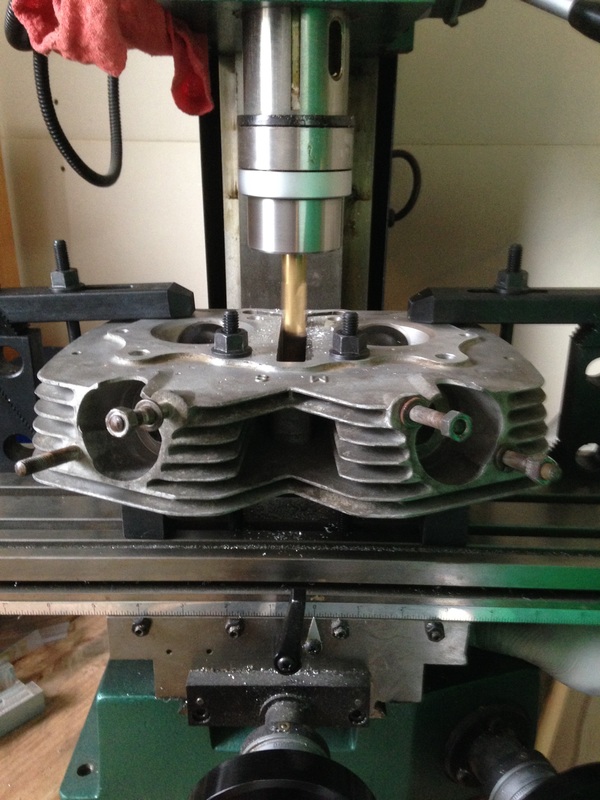
My brother had a Honda CB-350 motorcycle, which he was in the process of restoring. He got a new timing chain tensioner for the overhead cams, but the original timing chain slot in the engine head wasn't wide enough. That's where I came in. We fixtured the head on the mill, which was very simple, if not very easy.
My brother had a Honda CB-350 motorcycle, which he was in the process of restoring. He got a new timing chain tensioner for the overhead cams, but the original timing chain slot in the engine head wasn't wide enough. That's where I came in. We fixtured the head on the mill, which was very simple, if not very easy.
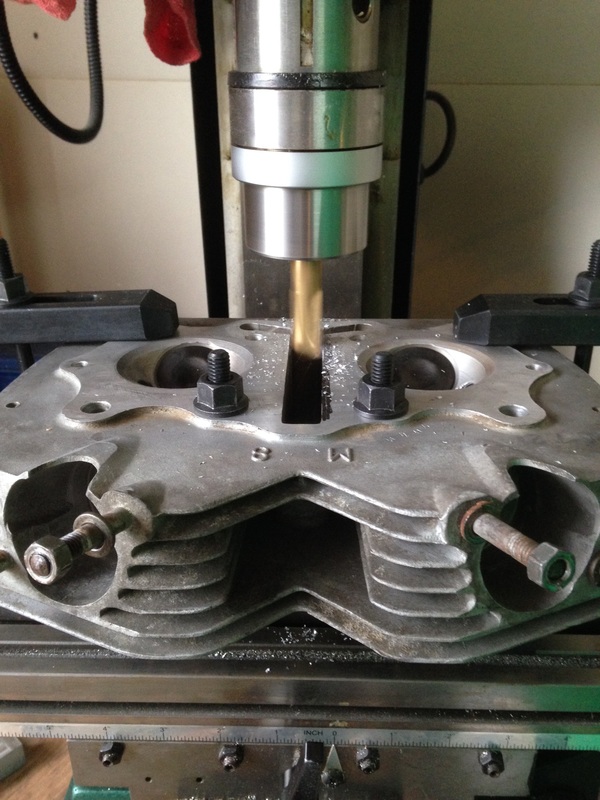
Cutting the slot.
The head didn't have an entirely flat surface on the bottom, which is why you can see it's sitting on two clamp straps. I was probably picking up bosses originally in the casting, though I can't remember now. Fortunately the flat surfaces available were parallel to the bottom of the head, or I'd have needed a machinists jack or two. The block did have two very convenient through-holes, which I stuck studs through and then tightened down with nuts, visible immediately to the left and right of the spinning endmill in the picture. The through-holes weren't in an ideal spot though, so I used regular step blocks (a LOT of them, as you can see) to hold down the back end of the block. I didn't need to use any stud couplers though, because clamping studs are always longer than you need for some reason.
The slot started out at .651 wide, and we needed to open it up to .800, to a depth of 1.50. I also measured the distance from each side of the slot to the combustion chamber dish and found that the slot was .025 closer to the right head. I was using an 11/16 endmill (.691), so I did some math and worked out that I needed to cut .042 into the right side, and .067 into the left side.
I zeroed the X-axis leadscrew, came over .042, widened the slot .800 deep, then locked the X-travel, took up the backlash, rezeroed the leadscrew, and came backward .109 to finish the job. The tensioner fit perfectly, and the bike's running today as far as I know.
I zeroed the X-axis leadscrew, came over .042, widened the slot .800 deep, then locked the X-travel, took up the backlash, rezeroed the leadscrew, and came backward .109 to finish the job. The tensioner fit perfectly, and the bike's running today as far as I know.
Both photos by Max Thomas
 RSS Feed